In order to enable Kubernetes applications to access disk storage, Persistent Volumes are required. While HostPath and LocalPersistentVolumes allow for storage, they are limited in capabilities and bound to single nodes, taking their storage with them on node failure. To provide redundant highly available storage, a provider of PersistentVolumes is required. One such provider is Longhorn.
Why Longhorn?
When it comes to self-hosted PersistentVolumes, there are two primary options. One is Rook, providing a managed CEPH configuration that provides block storage and PersistentVolumes, but can also expose it through higher-level abstractions like NFS or S3 protocols. While it is more capable and well-tested than Longhorn, it has one major drawback: it requires dedicated, unformatted drives. Especially for smaller clusters, it may not be feasible or economic to add extra drives just for volume storage, making Rook a poor fit in those scenarios.
Longhorn leverages HostPath volumes and builds an abstraction layer on top of them, to treat individual HostPath directories as replicas of a PersistentVolume, spreading replicas out between nodes to ensure availability of data in case of node or network failure. It manages the underlying HostPath volumes entirely on it's own, by automatically creating subdirectories in /var/lib/longhorn on each node, and even ensures not to utilize the entire disk for volume storage, to leave space for the operating system, temporary filesystems and container image caches.
Installing Longhorn
While longhorn is largely automated and doesn't need any special hardware configuration, it requires open-iscsi and NFSv4 to be installed on every node supposed to participate in the Longhorn cluster. You could manually install these on each node, using the official longhornctl command is much easier. Install the latest longhornctl release and let it install dependencies for you:
kubectl create namespace longhorn-system
longhornctl install preflight
Ensure all nodes are ready for installation:
longhornctl check preflightOnce the dependencies have been installed, you can install Longhorn itself, either with kubectl:
kubectl apply -f https://raw.githubusercontent.com/longhorn/longhorn/v1.10.1/deploy/longhorn.yamlor alternatively, install with helm:
helm repo add longhorn https://charts.longhorn.io
helm repo update
helm install longhorn longhorn/longhorn --namespace longhorn-system --create-namespace --version 1.10.1
This will create several pods spread throughout your cluster. You can watch the progress with the --watch flag:
kubectl get pods -n longhorn-system --watchOnce all pods are running and ready, your cluster will have access to PersistentVolume resources.
Verify volumes are working
To be sure the installation was successful and your storage is usable, we can create a PersistentVolumeClaim to have Longhorn automatically provision a PersistentVolume for us. The yaml for a 1GB volume claim would look like this:
pvc.yml
apiVersion: v1
kind: PersistentVolumeClaim
metadata:
 name: my-pvc
spec:
 accessModes:
   - ReadWriteOnce
 resources:
   requests:
     storage: 1Gi
 storageClassName: longhorn
It is important to specify the storageClassName as longhorn specifically, to ensure Longhorn will be the provider of this volume. Create the claim in your cluster:
kubectl apply -f pvc.ymlYou can now inspect the newly created PersistentVolumeClaim with
kubectl describe pvc my-pvcIf the volume creation was successful, the output may look something like this:
Name:         my-pvc
Namespace:    default
StorageClass: longhorn
Status:       Bound
Volume:       pvc-2352a5ec-87f5-4f7b-ba40-ced11eaf249a
Labels:       <none>
Annotations:  pv.kubernetes.io/bind-completed: yes
              pv.kubernetes.io/bound-by-controller: yes
              volume.beta.kubernetes.io/storage-provisioner: driver.longhorn.io
              volume.kubernetes.io/storage-provisioner: driver.longhorn.io
Finalizers:   [kubernetes.io/pvc-protection]
Capacity:     1Gi
Access Modes: RWO
VolumeMode:   Filesystem
Used By:      <none>
Events:
 Type   Reason                Age               From                                                                                     Message
 ----   ------                ----              ----                                                                                     -------
 Normal ExternalProvisioning  14m (x2 over 14m) persistentvolume-controller                                                              waiting for a volume to be created, either by external provisioner "driver.longhorn.io" or manually created by system administrator
 Normal Provisioning          14m               driver.longhorn.io_csi-provisioner-65cb5cc4ff-8zxgm_d3bc4a0a-5b25-4f00-8733-f36c728adac1 External provisioner is provisioning volume for claim "default/my-pvc"
 Normal ProvisioningSucceeded 14m               driver.longhorn.io_csi-provisioner-65cb5cc4ff-8zxgm_d3bc4a0a-5b25-4f00-8733-f36c728adac1 Successfully provisioned volume pvc-2352a5ec-87f5-4f7b-ba40-ced11eaf249a
The important parts are the Status being Bound and the events at the bottom of the output, stating that Longhorn started provisioning a persistent volume for the claim, and succeeded in doing so.
Accessing the Longhorn UI
Longhorn also ships with a Web-based user interface that helps in gaining an overview and managing storage operations. While you could expose this interface directly, it is often sufficient (and more sensible) to simply forward it to your local machine on-demand. This can be done using kubectl port-forward:
kubectl port-forward service/longhorn-frontend -n longhorn-system 8080:80As long as you leave this process running, you can access the Longhorn web UI at http://127.0.0.1:8080/, which will look like this:
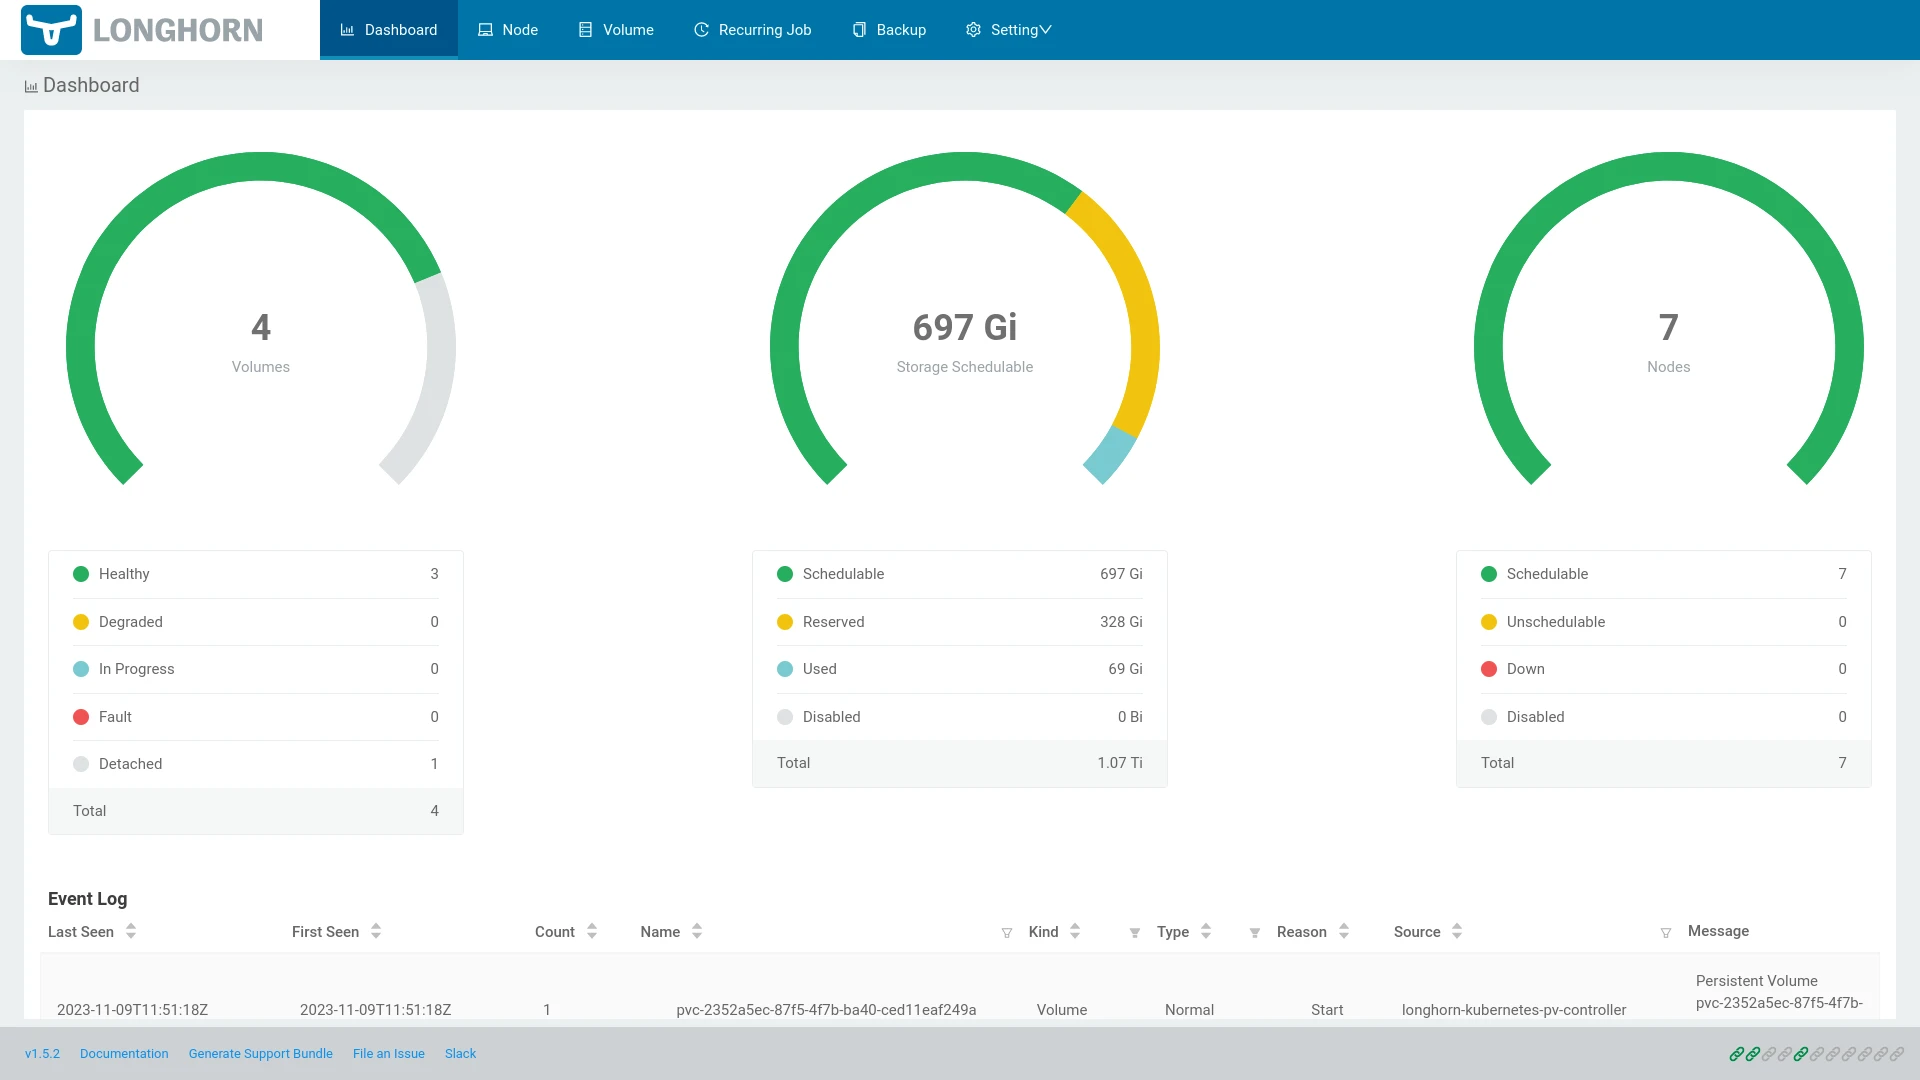
To stop forwarding, simply stop the process in your terminal. The UI contains several different pages, showing storage utilization among nodes, capacity usage, cluster health, volume states and backup configuration. It's features are beyond the scope of this post, but are certainly worth some time to learn more about.