Quickly sharing files and information has been a common need since the internet existed. From image boards and file sharing services to proxies and video platforms, many different services offer solutions to the same core problem. For developers, this problem is extended by the need to temporarily expose local websites in development or other programs to colleagues over the internet. The open source zrok project aims to solve this issue once and for all.
What is zrok?
Zrok is an open source sharing application built on top of the openziti zero-trust overlay network mesh project. Openziti provides security-centric networking to applications by communicating over their software networking solution through edge routers instead of interacting directly. Zrok uses this network to provide a public service that allows machines in private networks (like computers at home or in the office) to directly communicate with others through a temporary, optionally protected, public endpoint.
Setting up the zrok client
To get started with sharing media with others, all you need is the zrok command, an email to complete your signup and an internet connection. For installation instructions, follow the guide for your operating system here.
Once installed, you need to create an account. This can be done by running
zrok inviteThe command will then ask you for your email address. Type in any email you have access to and confirm. An email with a signup invitation will be sent to the email address, by clicking on the link provided in that message you will be redirected to the zrok website, where you can set a password to complete your signup. Once complete, the website will show you a short token needed to connect your zrok client to the newly created account:
zrok enable L0JRujf739MsOnce complete, your command is now associated with your account. You can verify the installation with
zrok statusThe output should look like this for a successful installation:
Config:

 CONFIG      VALUE               SOURCE
 apiEndpoint https://api.zrok.io env

Environment:

 PROPERTY      VALUE
 Secret Token  <<SET>>
 Ziti Identity <<SET>>
Sharing access to a local website
Web developers often face the issue of needing to provide temporary access to a website in development, perhaps to show a new feature implementation or get help fixing a bug. In these situations, setting up a properly hosted version can be overkill, or even undesirable in case of bug hunting. This problem is easily solved with the new tool we just installed. Assuming you want to share access to a website running on port 3000 locally:
zrok share public :3000Running this command will switch the terminal into a monitoring view, with a public address like https://vcikdowjf9uv.share.zrok.io at the top and a window with live logs of the received traffic below it. You can now share this link with anyone that has access to the internet and they can view your local website through it. When you are done sharing, simply stop the process in the terminal, and the share will be gone forever.
You may have noticed that we used public as the share type in the command. As you may have guessed, there is also a private option we could have used. While both allow sharing of local resources, they differ in how that sharing takes place:
publicgenerates a publicly-accessible url that the recipient can open and interact with in a web browser. They need not be zrok users themselves or even know it exists. The share is openly accessible from thezrok.ioplatform under the generated link.privategenerates a share token, similar to the one you received when you signed up. This token can only be used with the zrok private access command, and will peer-to-peer proxy the traffic between the sender and receiver directly. Instead of being available under a*.share.zrok.iourl, it will be proxied directly to a local port, as if the proxied program were running locally.
On a side note, public links can also be access as private shares to have them proxied onto the local machine. For example, the share url https://vcikdowjf9uv.share.zrok.io already contains the share token needed for that: vcikdowjf9uv. You could then have the public share proxied to a local port with:
zrok access private vcikdowjf9uvYou should now be able to access the application at http://127.0.0.1:9191 (the port may differ, check the terminal output if you encounter connection issues).
Sharing files and directories
Local files can also be shared quickly with the same command. If you wanted to share the contents of your local /tmp/sample directory with someone over the internet, you could simply run
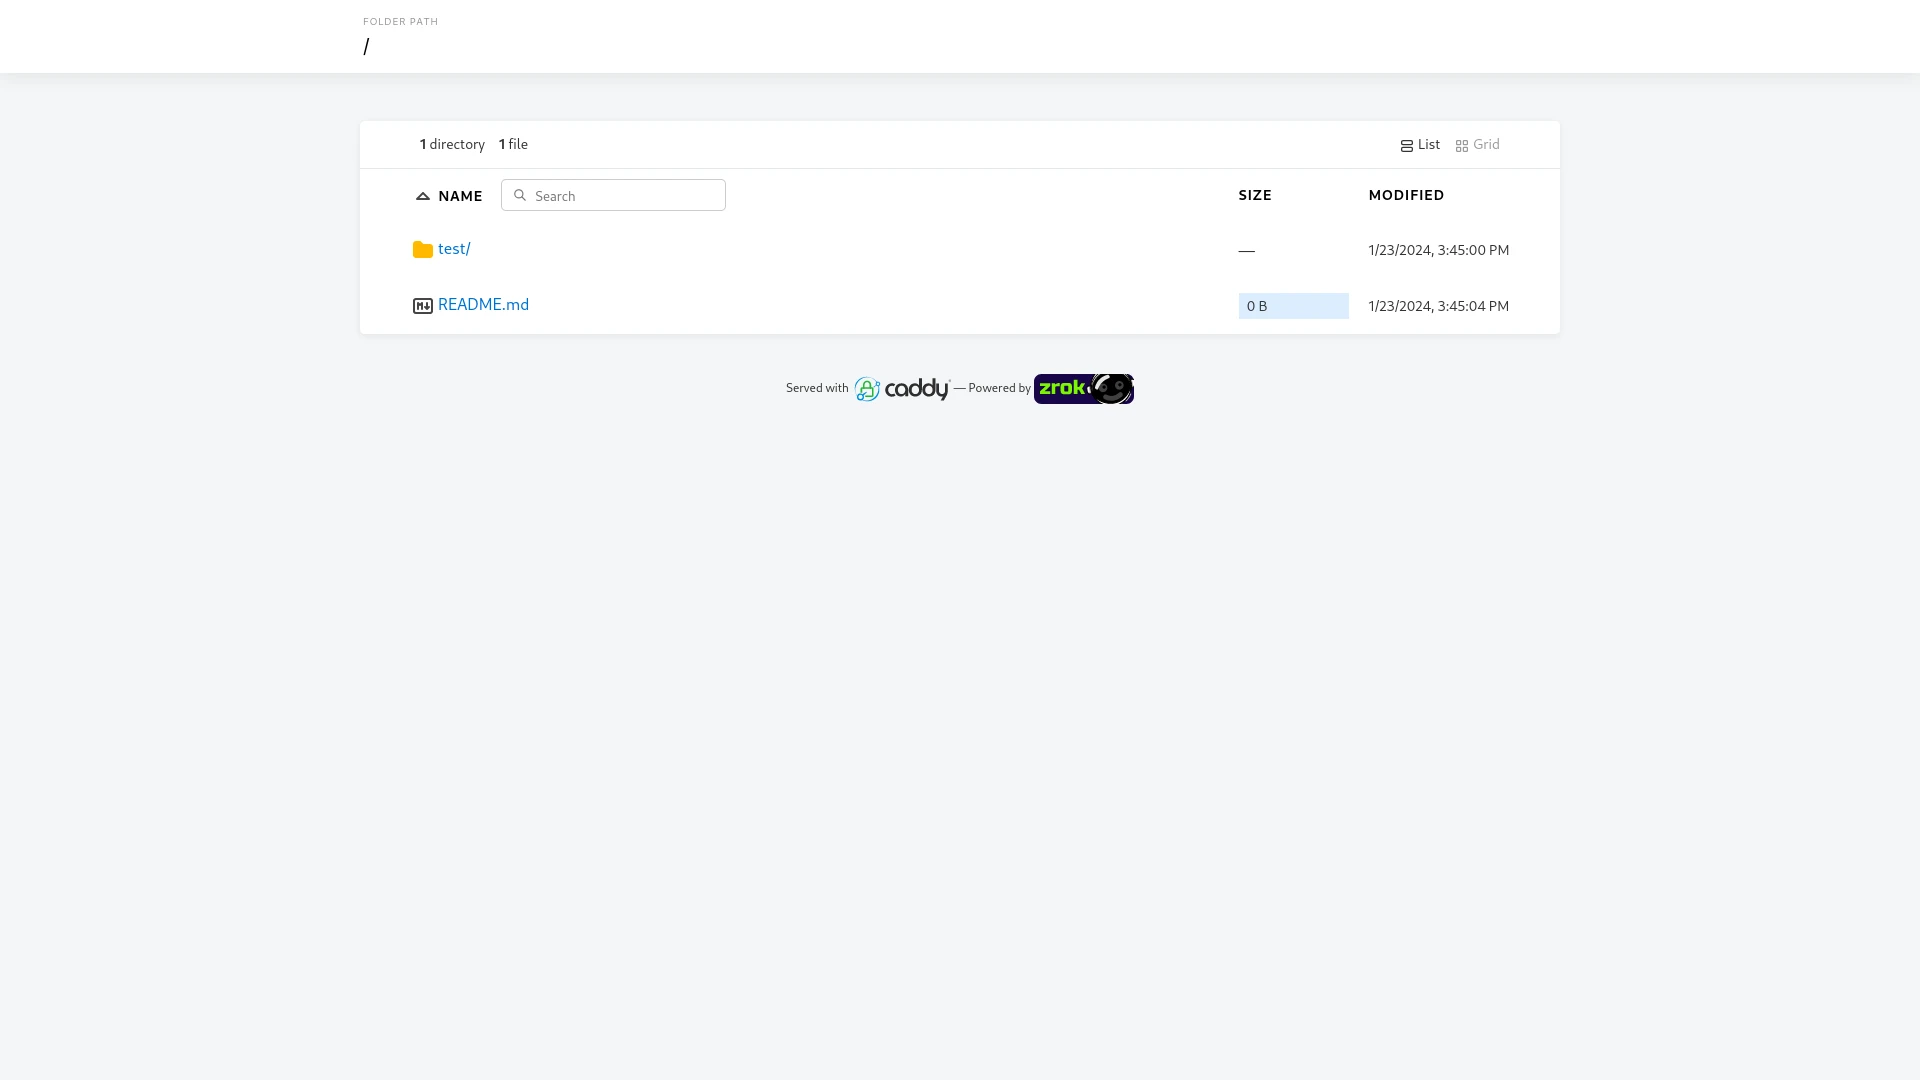
zrok share public /tmp/sample --backend-mode webThe generated share link will provide a web interface to allow recipients to view and download the files directly from their browser:
While this allows viewing and downloading files, there is currently no way to modify or upload new files through the web interface. You can do that however, using the drive backend mode:
zrok share public /tmp/sample --backend-mode driveYou will receive a new share url, but this one can't be opened directly from a browser. Instead, the recipient can interact with it directly from the zrok command in the terminal. The commands mimic the common linux temrinal commands ls, cp and rm to make it intuitive for new users:
zrok ls https://cq99lpdclikg.share.zrok.ioThis prints a list of current directory contents to the terminal:
┌──────┬───────────┬──────┬────────────────────────────────┐
│ TYPE │ NAME      │ SIZE │ MODIFIED                       │
├──────┼───────────┼──────┼────────────────────────────────┤
│      │ README.md │ 0 B  │ 2024-01-23 15:45:04 +0100 CET  │
│ DIR  │ test      │      │                                │
└──────┴───────────┴──────┴────────────────────────────────┘
You can transfer files to and from the shared directory with the cp command. To download the README.md file to the current directory, run
zrok cp https://cq99lpdclikg.share.zrok.io/README.md .Similarly, you can upload a new file new.txt with the same command:
zrok cp new.txt https://cq99lpdclikg.share.zrok.ioAnd of course remove it again:
zrok rm https://cq99lpdclikg.share.zrok.io/new.txtPermanent share tokens and links
When using public or private share modes, you will always receive a new, temporary share that will be erased once you close the sharing process in the terminal. If you want a permanent link or share token, you need to reserve one first. Let's make our shared directory /tmp/sample permanent as a web-accessible url:
zrok reserve public /tmp/sample -n sampledrive --backend-mode webNote that by using the -n flag, we can choose the token ourselves instead of having one generated for us. This token needs to be unique, alphanumeric and will be screened for profanity, so pick something that other's wouldn't be using already.
While that command gave us the share link already, it won't be accessible yet. To actually proxy traffic, we still need to run zrok share like before:
zrok share reserved sampledriveNote that this time, we did not need to specify the backend mode or directory again, since the reserved endpoint already had those saved. The share now behaves like the previous ones, allowing access until you stop the terminal process. You can start and stop sharing on a reserved link any number of times without the link changing.
When you don't want a reserved share anymore, you can remove it completely with the release command
zrok release sampledriveThis article highlighted just the basics of the sharing options that zrok has to offer. It can be used for more advanced tasks like proxying raw tcp/udp traffic from local services like ssh or ftp, directly expose docker containers over the internet or as a public ingress. You can quickly check which shares you have active and remove them if not needed anymore from the web ui, accessible by running zrok console. Finally, if the 10GB per day traffic limit of free accounts aren't to your liking, you can host your own instance and remove the need to trust a third-party company with your data.